
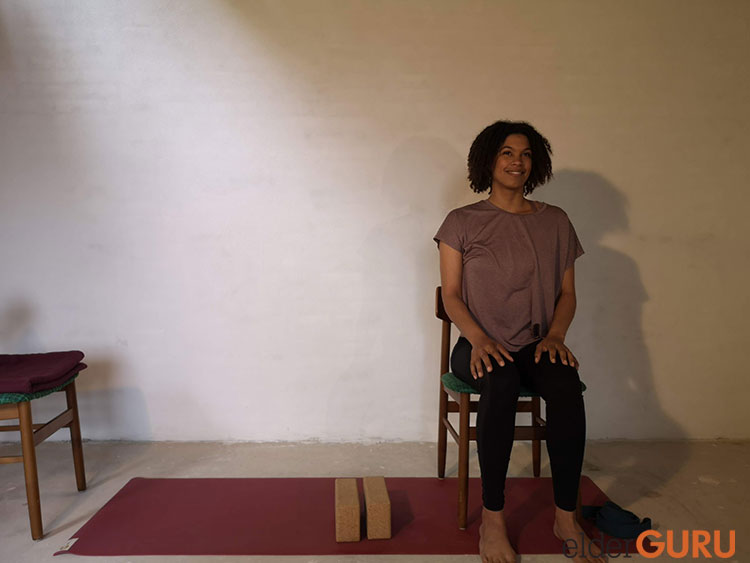
Chair yoga for seniors is a great way to overcome many age-related issues and ailments. The stretches are performed with the balance (safety) of sitting in a chair.
As you age, you might have more time to take care of yourself and do the things that make you happy in life. But with age most experience a loss of mobility and fatigue. The body may start to ache, and pain from joints is a common problem. Chair yoga can keep your body and mind healthy, so that you can keep living your best life.
It’s a perfect way to begin a larger, low-impact exercise routine or to get started with yoga for seniors more generally, Tai Chi for seniors, etc.
The accompanying video to this article is below:
Increase Your Wellbeing and Mobility
In this article, we will look into the benefits of chair yoga for seniors. You will get a full chair yoga routine with detailed descriptions of the poses to get you started.
Chair yoga is a very accessible yoga practice and might be the right choice for you if you:
- Have trouble balancing
- Are uncomfortable with getting up and down from the floor
- Want to start slow
Chair yoga is a very gentle and safe practice for most. But do check in with your healthcare professional. Your healthcare professional will be able to point out if there are certain movements you need to adjust to your specific needs.
The Benefits of Chair Yoga for Seniors
There are many benefits of yoga for seniors. Not only for your body but also for your mind. The benefits include such things as:
- improves mobility,
- better sleep,
- reduces depressive states,
- and strengthens the whole body.
With chair yoga, you can get many of the benefits in a safe and accessible way. Furthermore, research has found that with regular practice, chair yoga for seniors:
- reduces pain, improves gait speed, and lessens fatigue.
- increases overall health, physical- and mental well-being.
- develops and maintains strength in the whole body.
Note that chair yoga for seniors has not been proven to improve balance. One study found that there was no improvement in balance. This is likely because the act of sitting in a chair, while adding safety, does not engage the body’s core muscles as well. These are the muscles essential to improving balance. Therefore, you might want to do balancing exercises as a supplement to chair yoga.
How to Get Started With Chair Yoga
If you would like to join a senior chair yoga class, you can check with the senior centers in your community. Many senior communities and the Salvation Army also offer senior chair yoga classes. Joining a class can be a great way to socialize, and it can be a fun activity to do with friends or to get new friends. By joining a class with an instructor, you can also get guidance on how to do the poses with proper alignment. If you have any specific conditions, the instructor will be able to help you modify the poses for your situation.
Back to the need to improve balance, which chair yoga is less likely to help with, many of those same senior centers are likely to offer the Matter of Balance class, designed specifically for older adults who need to improve their balance. Also see my article on best balance exercises for seniors.
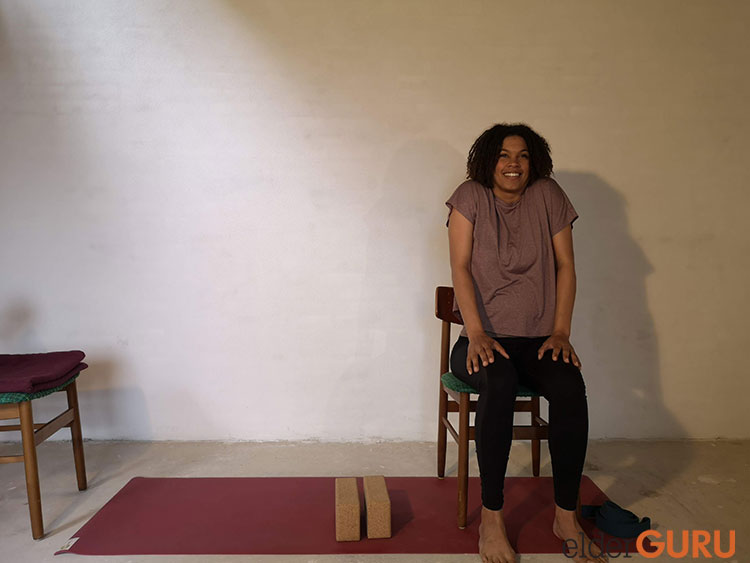
If you want to start your practice at home, you will need a few things. You need a sturdy chair placed on a clean and stable surface. Comfortable clothes that do not restrict your movement. You might also like to add a couple of yoga blocks, a yoga belt, and a firm blanket. I prefer cotton blankets because they don’t slide. You can use the blanket to sit on to make the chair more comfortable.
There are a lot of props that might help you and that will make your experience more pleasant:
- Yoga blocks can help to lengthen your arms making the floor come closer to you. They can also be used to lie, sit, or stand on.
- Bolsters offer great support and if you plan on doing Yin or Restorative yoga a bolster might be needed for several of the poses. Gaiam bolsters are also of decent quality.
- Yoga belts can be used for a variety of poses and are quite often used for leg stretches.
- Blankets that are firm for sitting or lying on.
Remember you will get the most benefits by practicing regularly.
The Best Chair Yoga Poses for Seniors
In the following, you can learn to do different chair yoga poses that are great for seniors. All poses are described carefully with pictures. Be mindful of your body and your breath. If you find it hard to breathe in one of the postures, slowly back out, and choose another variation of the pose. Always listen to your body. You do not need to stretch to the same degree I do in the pictures. How a pose feels will change from day to day.
The poses are categorized as either warm-ups, strength- and flexibility-building, or cool-downs. You can do them in the set order, as a sequence, or you can pick a few and start with those. Go easy on yourself and have fun with it.
7 Warm-Up Poses
When you warm up in yoga, you always start by centering. Using a couple of minutes to become aware of your breath and to ground yourself. One of the important things to be mindful of when warming up is to stretch your spine in all 6 directions. This will also stretch your ribcage and make room for your breath.
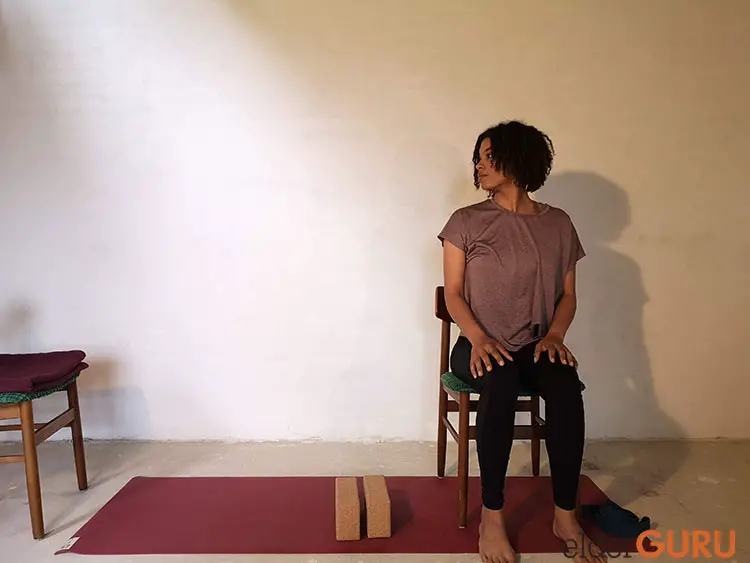
1 – Breath Awareness in Seated Mountain Pose
Sit tall on your chair – ears over shoulders, shoulders over hips. Ground your feet hip-width apart on the floor. Place your sitting bones evenly on the chair. Engage your abdomen lightly and bring your navel in and up just a bit. Open your chest. Roll your shoulder blades back and down. Let your hands rest on your thighs or knees. This is mountain pose.
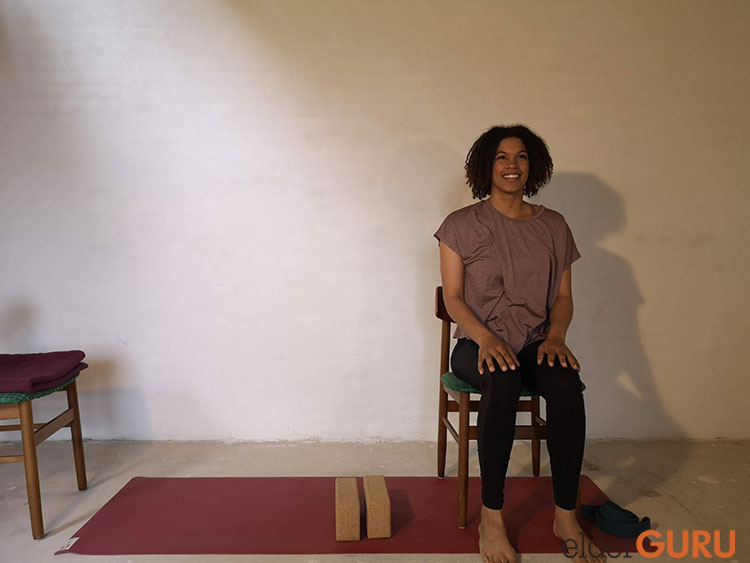
Now place one hand on your abdomen and the other on your heart. Begin breathing in and out through your nose, if this feels comfortable. You want to actively use your diaphragm, which is your primary respiratory muscle.
Pull your diaphragm down and let your abdomen rise on the inhale. Release your diaphragm and let your abdomen fall on the exhale. Your hand on the abdomen should rise and fall with your breath. Continue this breathing for 5-10 breath cycles.
2 – Seated Cat Pose – Cow Pose
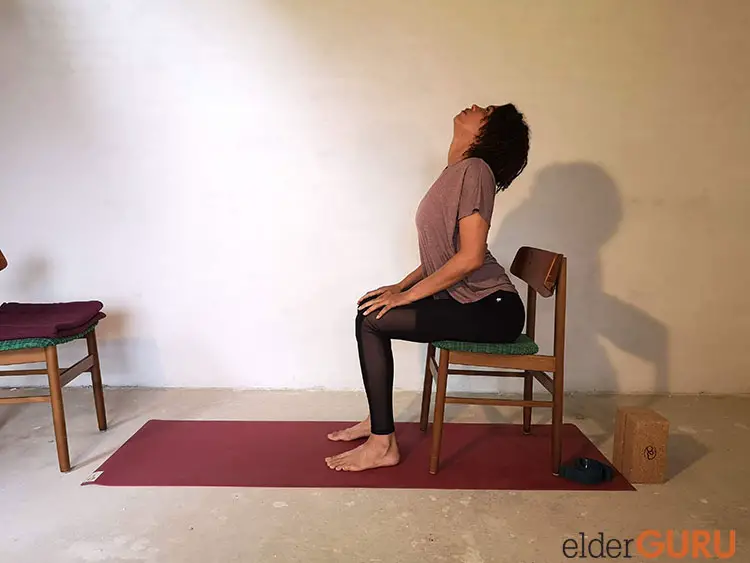
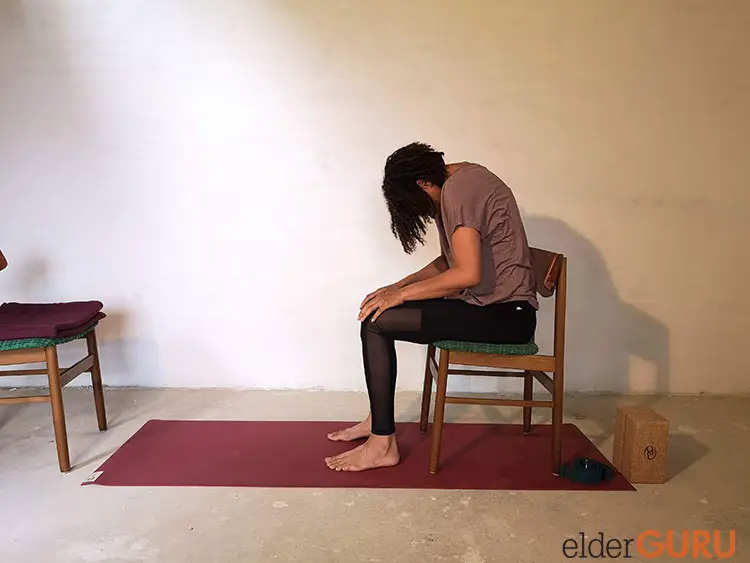
Sit in mountain pose. On your inhale, arch your back and, if it feels comfortable in your neck, look up. This is seated cow pose. On your exhale, round your back, pull your navel towards your spine, and look towards your navel. This is seated cat pose.
3- Seated Side Stretch
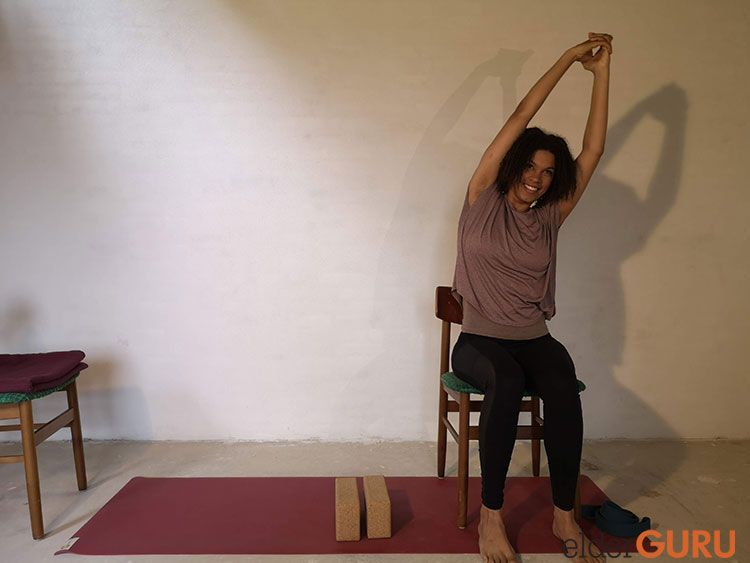
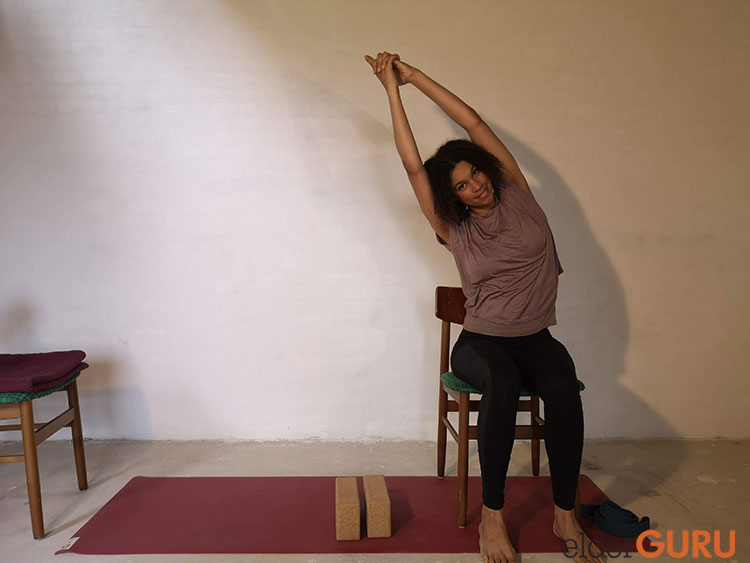
Sit in mountain pose. On an inhale, reach your arms towards the sky. The arms can be bend or straight depending on what feels best in your body. You can interlace your fingers if this feels comfortable. On your exhale, bend to the right. You can stay here for a couple of breaths. Inhale to come back up. Repeat on the opposite side.
4 – Seated Twist
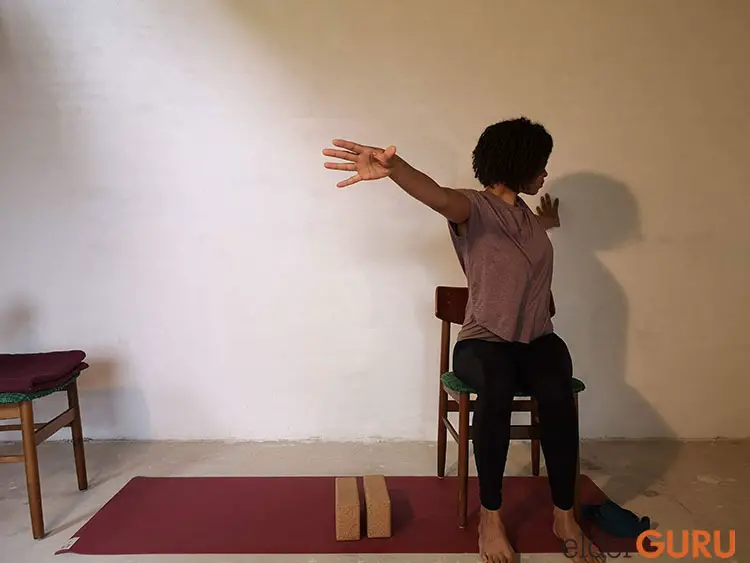
Sit in mountain pose. On your inhale, cactus your arms or reach out to each side in a T-shape. On your exhale, twist your upper body to your right. Stay here for a couple of breaths. Use your inhales to lengthen your spine. Exhales, to maybe twist a little deeper.
If you have osteoporosis or suffer from pain in your lower back, be very careful not to twist too deeply. If it feels better to keep your arms down your sides, feel free to do so. Do not use your hands and arms to pull deeper into the twist, as this may strain your lower back.
5 – Seated Neck Stretches
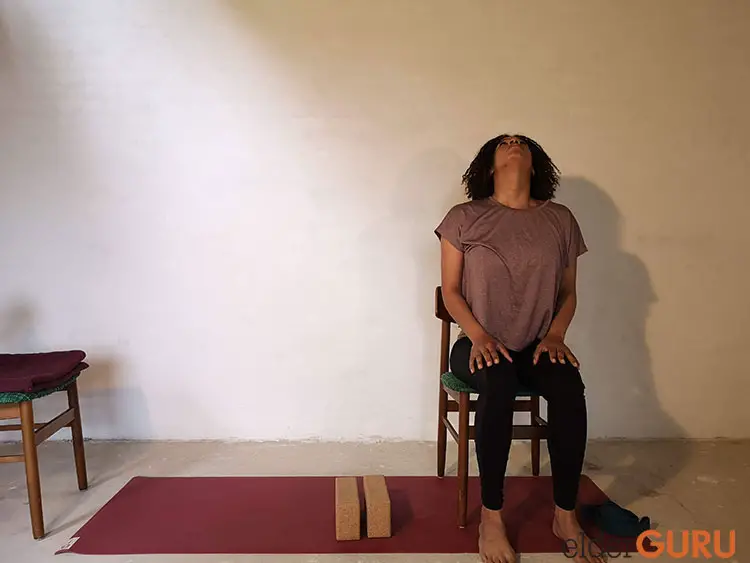
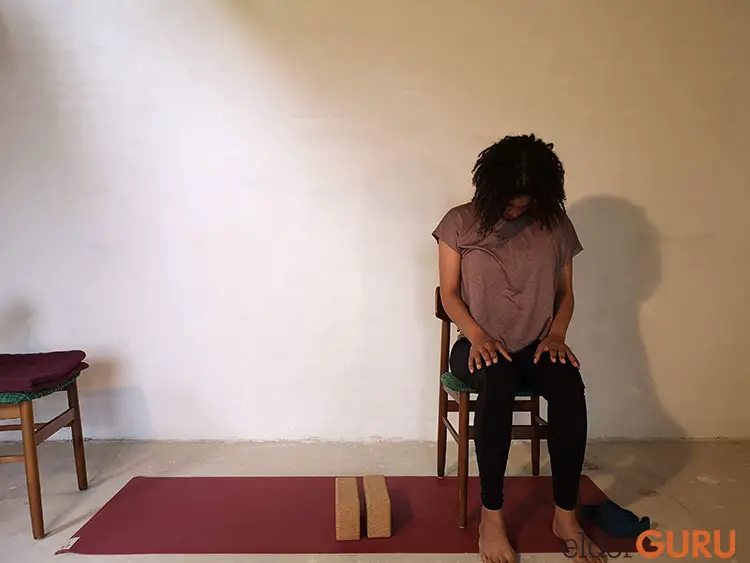
Sit in mountain pose. On your inhale, lengthen your spine from your sitting bones to the top of your head. Exhale, gently release your head forward. Your chin towards your sternum. Inhale, chin towards the sky, look up. Exhale, chin towards your sternum. Continue this movement for a couple of breaths.

On your inhale, let your head come to neutral. On your exhale, move your nose to the right, and look to the right. Inhale, back to center. Exhale, move your nose to the left, and look to the left.
6 – Seated Shoulder Rolls

Sit in mountain pose. On your inhale, shrug your shoulders. On your exhale, roll your shoulders forward and down. Repeat a couple of times. Followed by rolling your shoulders back and down.
7 – Seated Cactus Arms With Finger Activation


Sit in mountain pose. Cactus your arms out to the sides. On your inhale, stretch all your fingers. On your exhale, close your hands to fists. Repeat as many times as you’d like.
6 Strength and Flexibility Building Poses
Some of the poses in the following might be challenging. Start with the poses that feel alright. After practicing for a while, you can start practicing the poses that feel more challenging for you.
1 – Downward Facing Dog With Chair Support
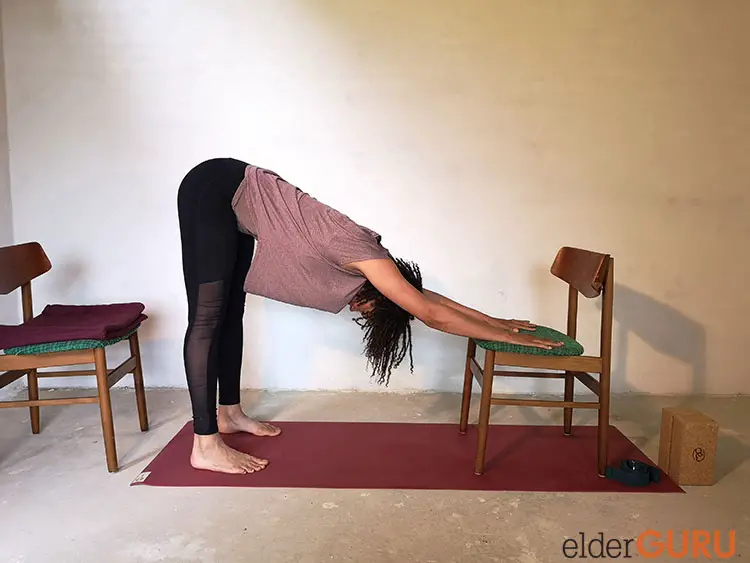
Stand in front of your chair. You can place the chair with either the front or back facing you, depending on which height suits you best. Place your hands on the chair, and walk your feet back until your back is straight. Your feet are grounded with hip-width distance.
Press your hands into the chair. Roll your shoulders back and down. Engage your core muscles, squeeze your navel up and in. Open your chest. Point your sitting bones upward. Stretching the whole backside of your body. Breathe here. Stay for a couple of breaths.
Tip: You can use a table instead of a chair if this feels better in your body.
2 – Seated Boat Pose
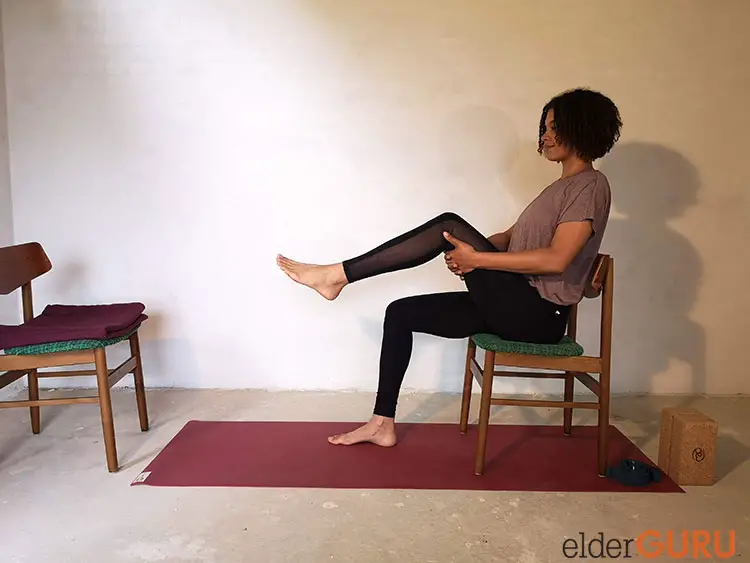
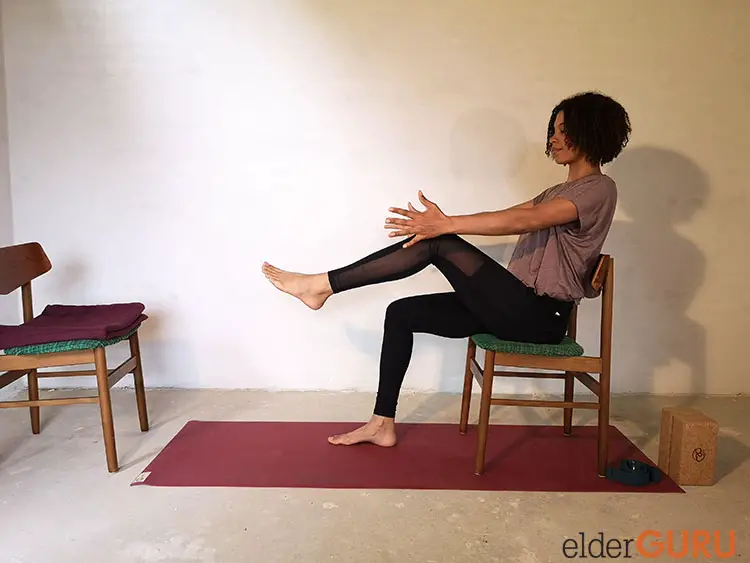
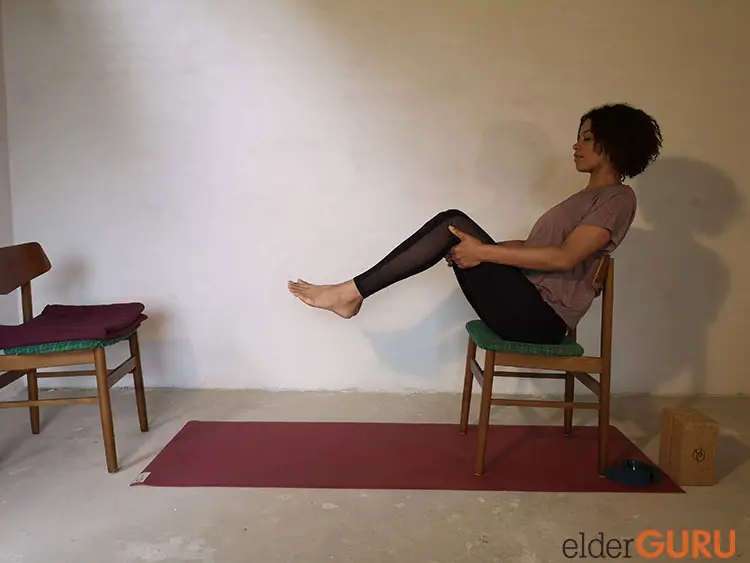
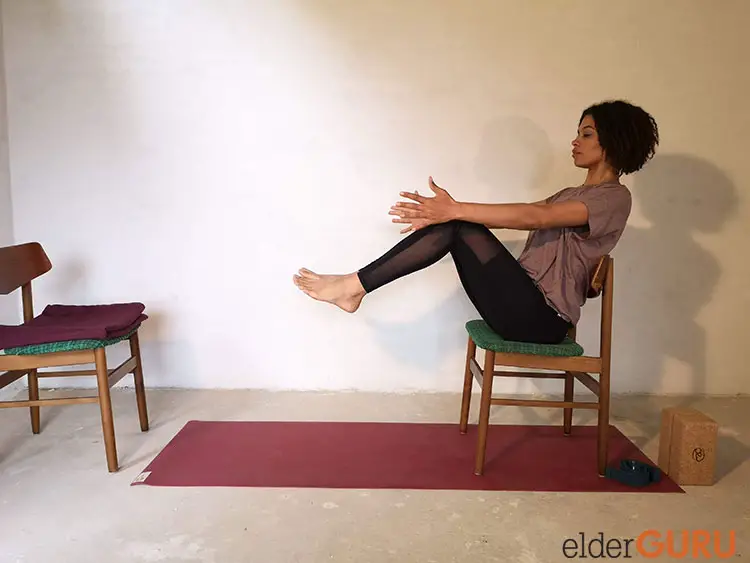
You can do this pose with both legs at the same time or one leg at a time. Sit on your chair with your sitting bones towards the outer edge. Make sure you still feel comfortable and stable. From here you can lift either one or both legs. Grab onto the backs of your thighs with your hands. Engage your core. Pull your navel in and up.
Make sure not to round your back. Find your balance. If you’d like, you can experiment a little here. Try to let go of your legs and reach your arms forward. Or you can try to straighten your legs, still holding on to the backs of your thighs. This is a great pose for core work. Remember to breathe.
Tip: You can also try placing blocks under your feet, which can make the pose more accessible.
3 – High Lunge With Chair Support
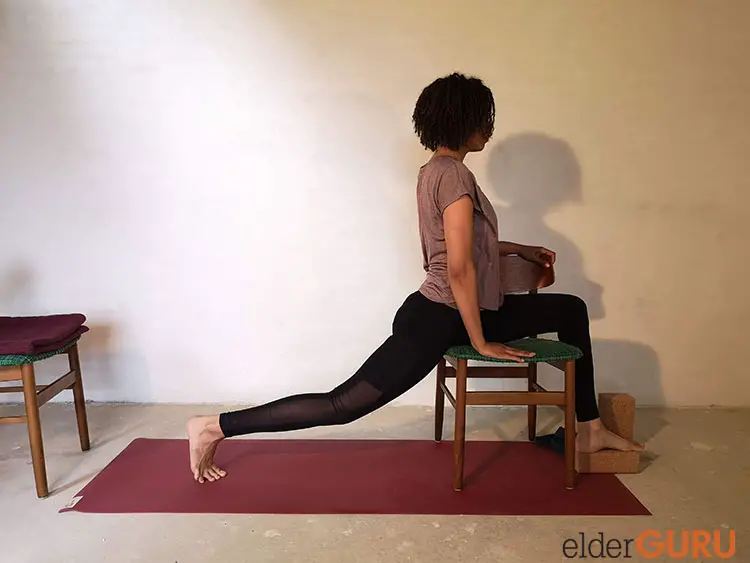
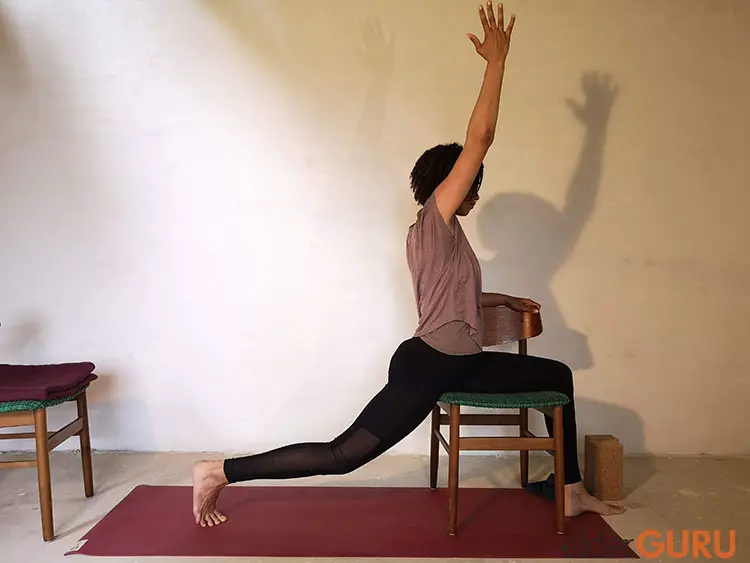
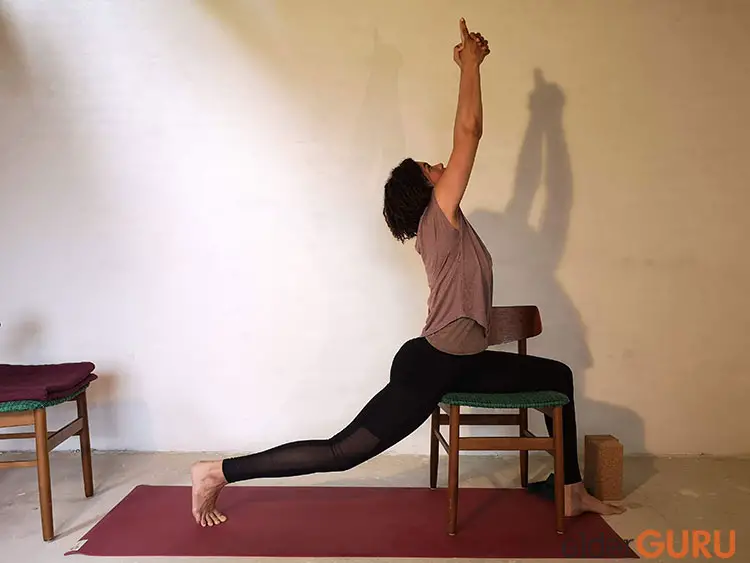
Bring your right leg and foot towards the right side of the chair and turn your torso. Grab onto the chair for support. Straighten your left leg behind you. Curl the toes of your left leg under. Make sure your front right knee is stacked over your ankle. Find your balance. Engage your core muscles.
You have the option to reach your arms to the sky. You can also reach the left arm upward while holding on to the back of the chair with the right hand. This pose will stretch your hip flexor. Breathe here for a moment and repeat on the opposite side.
Tip: You can place a block under your front foot.
4 – Seated Eagle Pose
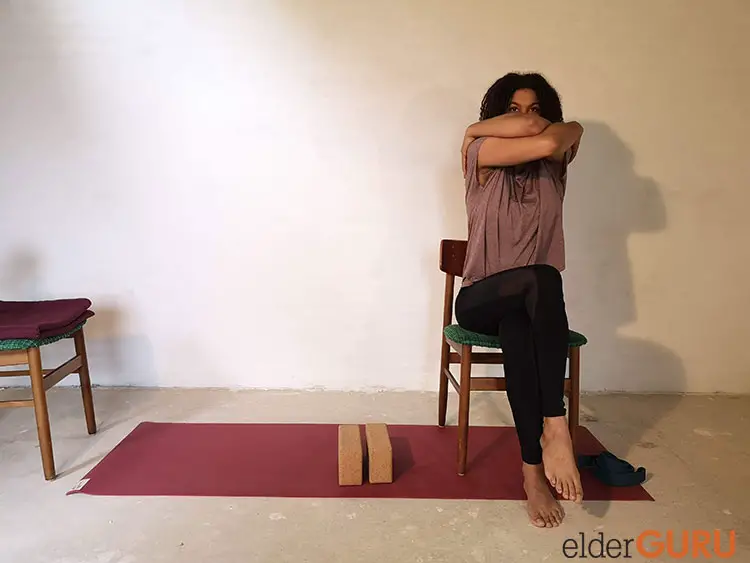
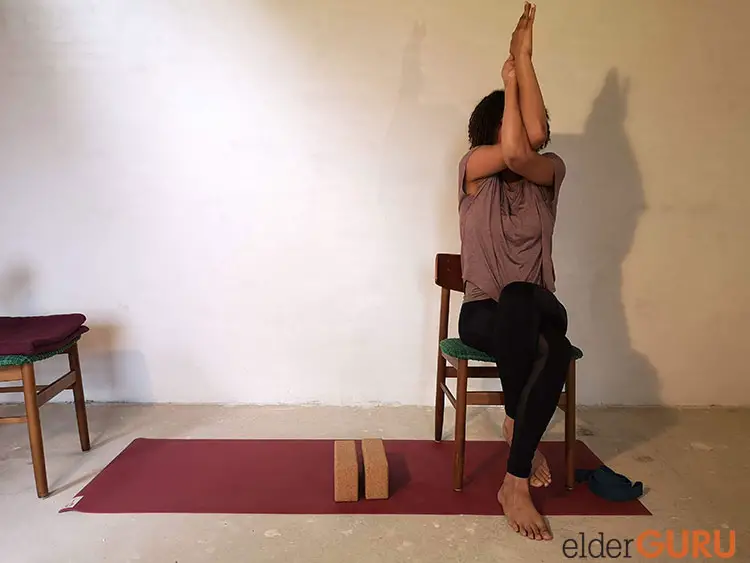
Sit in mountain pose. Cross your right leg over your left. If it is available to you, you can place your right foot behind your left leg. Interlacing your legs. Reach your arms out to the sides. Cross your upper arms with the right arm on top. From here you have a couple of choices.
You can place your hands on your shoulders – giving yourself a hug. You can place the back of your hands together. Or, you can interlace your lower arms and let your palms meet. Whatever you choose press your elbows up.
If your forearms are facing upward, press them away from your face. You will get a nice stretch in your glutes and rhomboids while strengthening your core and shoulders. Remember to keep your core active and breathe. Stay here for a couple of breaths. Repeat on your opposite side.
5 – Seated Camel Pose
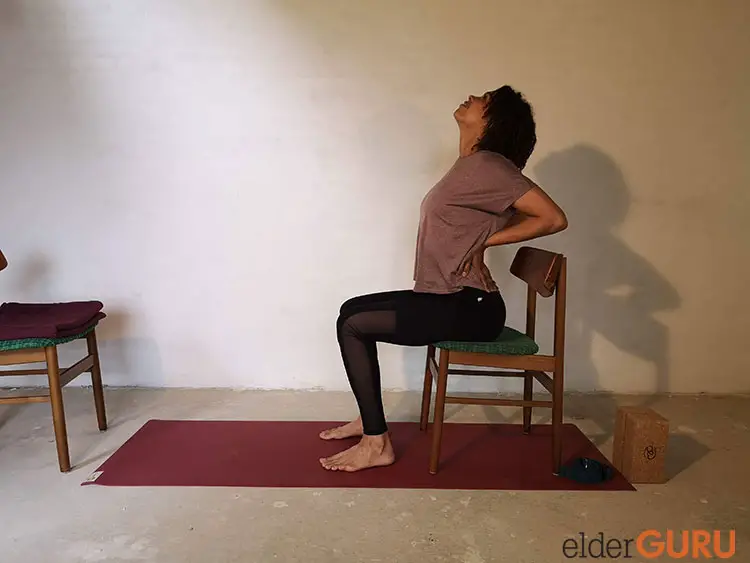
Sit on your chair with your sitting bones towards the outer edge. Make sure you still feel comfortable and stable. Ground down through both feet. Feet are placed hip-width apart. Now place your hands on your lower back, fingers pointing down. Roll your shoulder blades back and down. Open your chest. If it feels comfortable in your neck, you can look up. Take a few deep breaths here.
Tip: If you cannot reach your lower back, you can grab onto the outer edges of your chair.
6 – Seated Butterfly Pose
There are two options for this pose. Either a half butterfly or a seated butterfly.
Half Butterfly
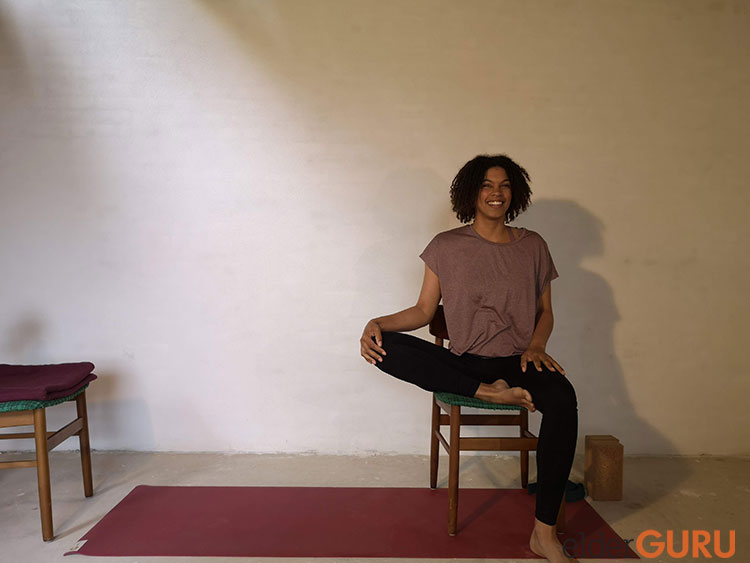
Sit in mountain pose. Bring your right foot upon the chair. The sole on the inner side of your left thigh. You can grab onto your foot with both hands or release your arms down to the sides. On your inhale, lengthen your spine. On your exhale, see if you can release the tension in your right hip and let the knee sink deeper out to the side. Stay here and breathe for a couple of breaths. Then change sides.
Seated Butterfly
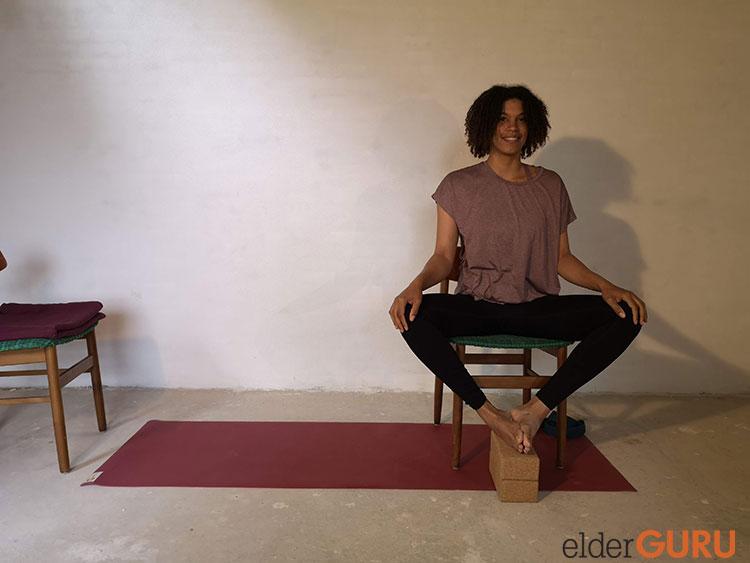
Sit on your chair with your sitting bones towards the outer edge. Make sure you still feel comfortable and stable. Bring the soles of your feet together and let your knees fall out to the sides.
Tip: You can place blocks under your feet.
Both variations are great hip openers. Try them out to experience which works best for you.
4 Cooldown Poses
Cooldown poses are just as important as the more engaged exercises. They are particularly beneficial for the mind, feeling the effects of the stretches, centering, and relaxing. Chair yoga, and yoga in general, benefits the mind as much as it does the physical body.
1 – Seated Pigeon Pose
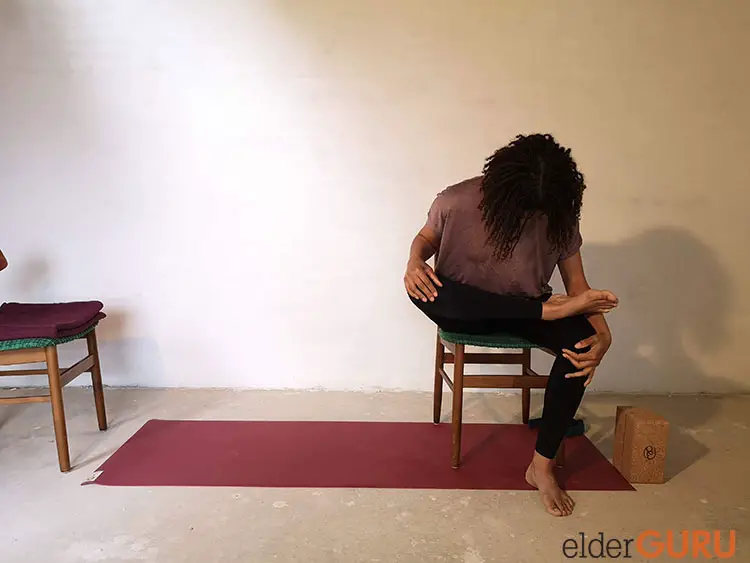

Sit on your chair with your sitting bones towards the outer edge. Make sure you still feel comfortable and stable. Place your right ankle on top of your left knee or thigh. On your inhale, lengthen your spine. Exhale, move your chest towards your legs.
Make sure not to round your back. Stay here and breathe for a couple of breaths. This stretches your lower back and glutes. To come out of the pose, inhale and bring your upper body up. Exhale and bring your right foot back to the ground. Repeat on the opposite side.
Tip: If you cannot place your foot on the opposite knee or thigh. You can place a block or stack of blocks on the inner side of the grounded foot and place the foot on top.
2 – Seated Leg Stretches
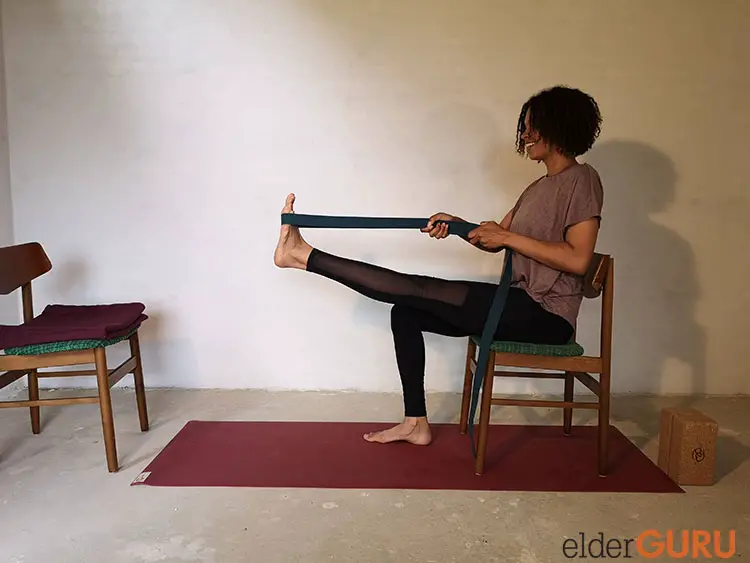
Place a yoga strap around your right foot and grab the strap with your right hand. Sit back in Mountain pose. Flex your right foot and straighten the right leg. Make sure to lower your shoulders and release all tension.
This is a great hamstring stretch. Stay here and breathe for a moment. Exhale to release. Repeat on the opposite side.
3 – Seated Child’s Pose
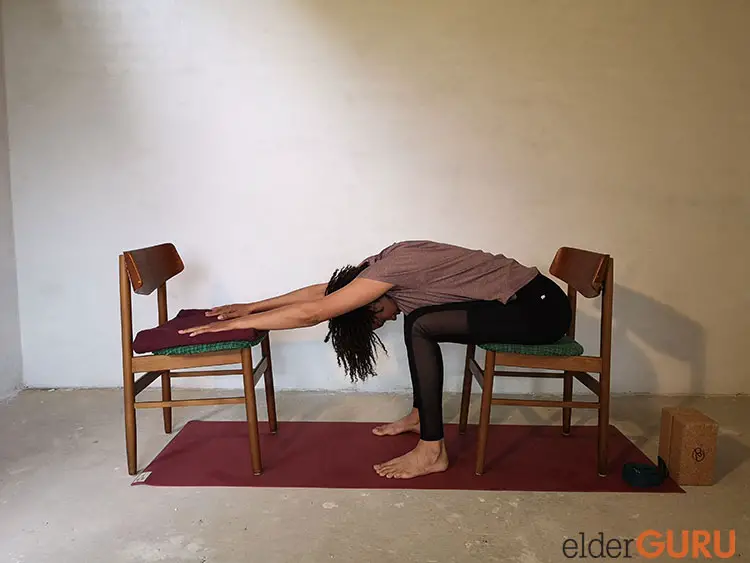
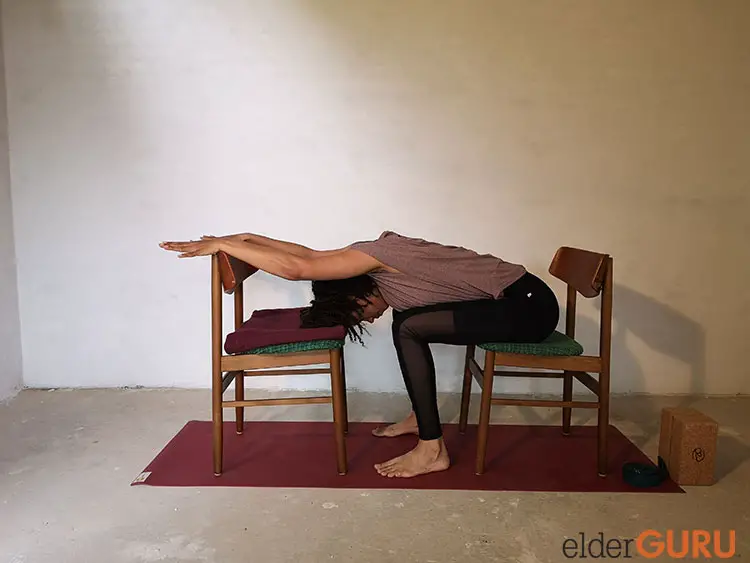
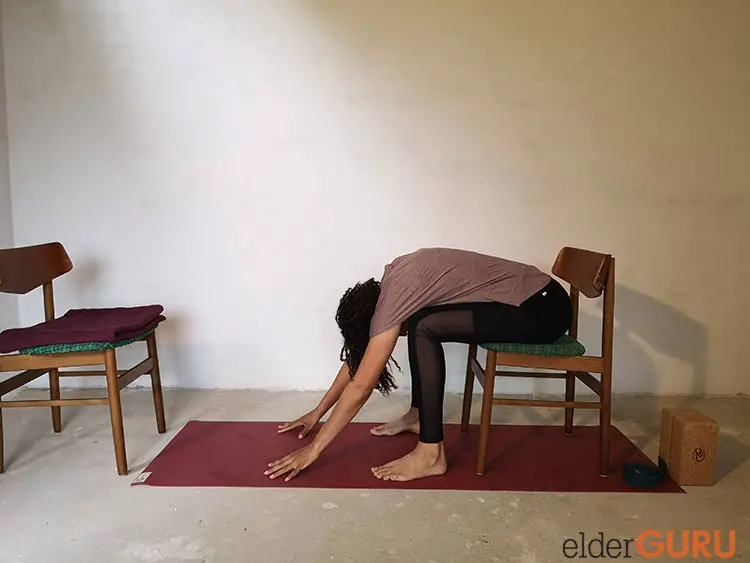
For this pose, you might need two chairs and a blanket. Sit on one chair and place the other chair in front of you, possibly with a blanket on top. Inhale, lengthen your spine. Exhale, place your head between your legs or on the chair (with the blanket) in front of you. Place your palms face down on the chair in front of you or let your fingertips come to the floor in front of you. Breathe deeply. Stay as long as it feels comfortable.
4 – Ending Relaxation
You can end the sequence in the Seated Mountain pose. Sit for a couple of breaths. Bring your attention to each part of your body. You can start from your feet moving to the top of your head to feel more energized. Or, you can start from the top of your head moving to your feet to feel more grounded. When you are ready, come back to your daily activities.
Wrap Up
There are many benefits to chair yoga for seniors, but really, there are benefits for everyone. Beyond seniors, they are great stretches for people that sit at a desk all day. You do not have to go to a yoga studio to perform them. They can be performed anywhere there is a solid chair (desk chairs may be a problem if they have wheels). Remember to start slow and check with your doctor first if you have health issues.

About the Author:
Shasmina is a yoga and meditation teacher. She has a Master’s of Social Sciences in Philosophy and Social Science and is the owner of Mærk Efter, where she guides students in the teachings of yoga both individually and in group classes. Visit her LinkedIn page.